Showing posts with label peterman921. Show all posts

Friday, August 12, 2011

challenges


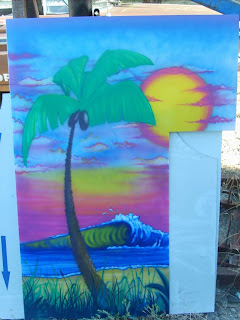
I was asked to paint a panel to replace the ad panel in a coke machine, the paints I use are opaque and the panel would be backlit so I needed some transparency. I mounted the panel up on some 2 X 4's and leaned them up against the partially open garage doors so I could get light behind the painting and know how much paint I was laying down. The difference is like night and day.


here is the panel with light from the front


and here it is lit from behind

Monday, August 8, 2011

A little more work


I finished the wall sign Saturday, next up is the sign on the front of the building, but I'll have to hire a boom to get up over the awning.

I also delivered some corex signs and picked up another job. I'll be painting a beach scene on a piece of plexiglass that will replace the original in a coke machine, and tomorrow I've gotta paint one more sign at the baseball field.

Tuesday, July 26, 2011

Busy, Busy, Busy again

well heres the photos of the lawn chairs I promised a week or so ago.


work has been real good and lots of communication with potential clients. the permit applications have been submitted for the wall signs so that should be a go soon.

all the signs that are going to get done have been done at the ball field for this year


I've also done an antique style sign for the GPHS class reunion of 1968 taking place in a week or two

There's a bunch more but I'll save it for later

Friday, July 1, 2011

A little update

Well I've been working intermittently at the ball park due in part to weather and most of the work is done, still 2 signs to go.

I am running a mural special for the month of July, up to 48 sq ft for $1000 for the first 5 murals commissioned.

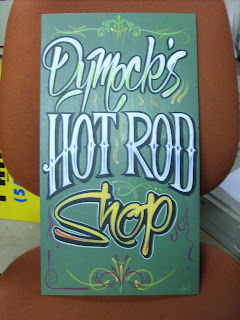
I have also been painting some old lawn chairs from the fifties one will have a zebra pattern and the other a cheetah, they will be titled "Predator and Prey". Also did a few rustic garage/hotrod signs, and pulled a little wooden tray out of the trash and painted it up for a friend.


Monday, June 20, 2011

Shut out at the ballpark

Today there was an early game, 11am, so players were already out on the field at 9am so no work today on the signs. Back at it tomorrow but more of the same on Wed.

In the mean time here is a picture of the Bigfoot art piece I worked on last week.


6ft X 12ft, that's a Bigfoot

Thursday, June 16, 2011

still more ballpark


Yesterday we scraped and primed two signs and touched up the Copeland sign


Today I added the address to Leavitt Group and called it done and went on to painting Fields and the Active Club


Monday, June 13, 2011

Take me out to the ballpark

A couple of weeks ago I was contacted by the president of the local baseball league to repaint the signs surrounding the field, as the previous sign.painter was retiring for medical reasons.

Today I finished the first of these signs, only 14 more to go :)

the signs are 8ft tall by 12ft long on average, a few are bigger and there are a couple that are smaller.

They are in very rough condition and require scraping and priming prior to any painting

This sign is typical of the condition of most of the signs, this sign is not yet on the list. One I will be painting is next to this one.

This one gets painted tomorrow with a few changes.


This is what I faced this morning after prepping last Thursday.


And this was two hours later double coated and ready for a few more years service

a little (more) Bigfoot

Last week I got a call from the Bear Hotel. They needed one more thing done, Bob Eding needed some lettering done for a new way finding art piece to direct people to the Intergalactic Headquarters of Bigfoot.

The crew at the Bear Hotel made a 6 by 12 ft foot to be mounted on a pedestal weighing 1700lbs that will be located in downtown Grants Pass.

So last Wed I went in armed with a cut vinyl mask and applied it to the styro foam that we would mount to the structure. After applying the mask we loaded a spray bottle with lacquer thinner and misted over the whole thing to get a raised letter as the lacquer thinner melts the foam


I left Bob to finish carving and mounting the foam to the frame.


I went in today to finish painting as Bob was at his son's graduation


The monument should be in place tomorrow, I'll swing by and get a picture.

Sunday, June 5, 2011

Magic-Sculpt

The material that I use to cover my armatures (in this case the styrofoam) is called Magic-Sculpt. it is a two part epoxy similar to JB Water Weld that some may be familiar with.

This material however is not quite as stiff and sets up in about three hours and gets rock hard in 24 hours. It also does not have a memory so after allowing it to set up for awhile you can still shape it and it will hold the new shape. Once it is dry you can sand it, drill it, even machine it. It takes all kinds of paints and is very user friendly. I am however allergic to it and need to use gloves to work with it.


To use it, take equal parts by volume and knead it together until there are no more streaks in it, about 7-8 minutes.

After kneading it is fairly soft and pliable and very easy to apply, but on warm days will start to set up and get stiffer as your working with it.

I use a variety of tools to apply texture to the clay, the texture in my gloves, crumpled aluminum foil, paint sticks, you can even embed sand and gravel in the material. Magic-Sculpt can even be used in press molds to duplicate a multiple of small items such as rivits and any small repeating pattern.


Here I used foil for the bark and a wire brush for the edges of the bark.

I buy my Magic-Sculpt at Kit Kraft in 100 lb kits, but they offer smaller quantities if you want to try it out first.
Monday, May 30, 2011

New Projects 2

The next sign will be a lobby sign. I am building this on spec so it may end up on my display wall.
My intent is to build it and then try to sell it to the Bear Hotel and if they are not interested I may try the Black Bear Diner.

Heres the sketches:

This is the first sketch but I didn't like the bear so I drew another

I like this one a lot better

I then went into Coreldraw and laid out an oval and the lettering (a grunge font found online) for the log end and sent the file to my Summa D-60 plotter. I then cut out the pattern and spray glued it to the polystyrene foam.


The next step was to use a hotwire knife to cut out the foam shape. At first I used a cheap foam cutter I picked up at Michael's but it wasn't up to the task, this foam is much more dense than what the knife was made for, so on to the home made hot wire I built using an old transformer and dimmer, it worked much better. there are many commercial cutters available but I had all the parts here so I just built rather than buy.


I then redrew the lettering and cut them out of 1 inch foam on my scroll saw and I grooved the edge of the oval to start the bark texture. I then glued the letters down with a product called magic smooth a two part epoxy with consistency of heavy petroleum jelly, made by the same folks that make the magic sculpt putty that I use like clay in my sculptures


I'll make more updates as I continue on these projects

New Projects

Today I started two new projects (like I needed anymore), one has been stewing for awhile and the other came to me last night as I went to bed.

the first one is a mailbox stand for my parents. Several years ago I painted a large rural mailbox with a three mast sailing ship on the open ocean, they never used it because they lived in town and had no place to put it, they have moved out about 6 or 7 miles outside of town and are now going to use it.

I will build a support to look like pilings with a pelican sitting on one and some tidal zone critters on it. below is one of the sketches I did to get a feel for the project and how it should look.


I looked up regulations for mailbox height and found it to be 41 to 45 inches from the ground to the bottom of the mailbox. Sono-tubes come 48" tall so I cut 8" off one and screwed that piece to the other one to set my height. I then fiberglassed it and set it aside to cure.

Later I will plug the ends with styrofoam and start applying epoxy clay so that I can texture them to look like old weathered pilings.

Saturday, May 28, 2011

Busy, busy, busy


well it's been a few busy weeks. Working at the Bear Hotel, painting windows, and some double sided signage.

The Bigfoot mystery build is just about done and ready for the public to solve the mystery. The biker bears (the Wild Bunch) are placed in their spots downtown with the murals and some miscellaneous props, bigfoot's home is almost ready to be furnished and the twinkie enhancement lab is just about done, and the miners shaft is looking way cool, quite the bit of eye candy for the folks and visitors of Grants Pass.


Wednesday, March 16, 2011

Nearing the Finish


Well the 40 Acres sign is about 95% done a little detailing and touch up and I can send it on its way. I still need to build a stand so that my parents can display it at the car shows with the truck.

Saturday, January 8, 2011

continued...

most all the parts are now cut and set into place

Now I gotta glue it up and paint it.

another step closer


I've got the signboard done and the letters cut out. the skull will be attached with a
1" piece of steel going through the sign and into the back of the skull
sandwiched between layers of precision board high density urethane (HDU).